Manage groups for single sign-on authentication users
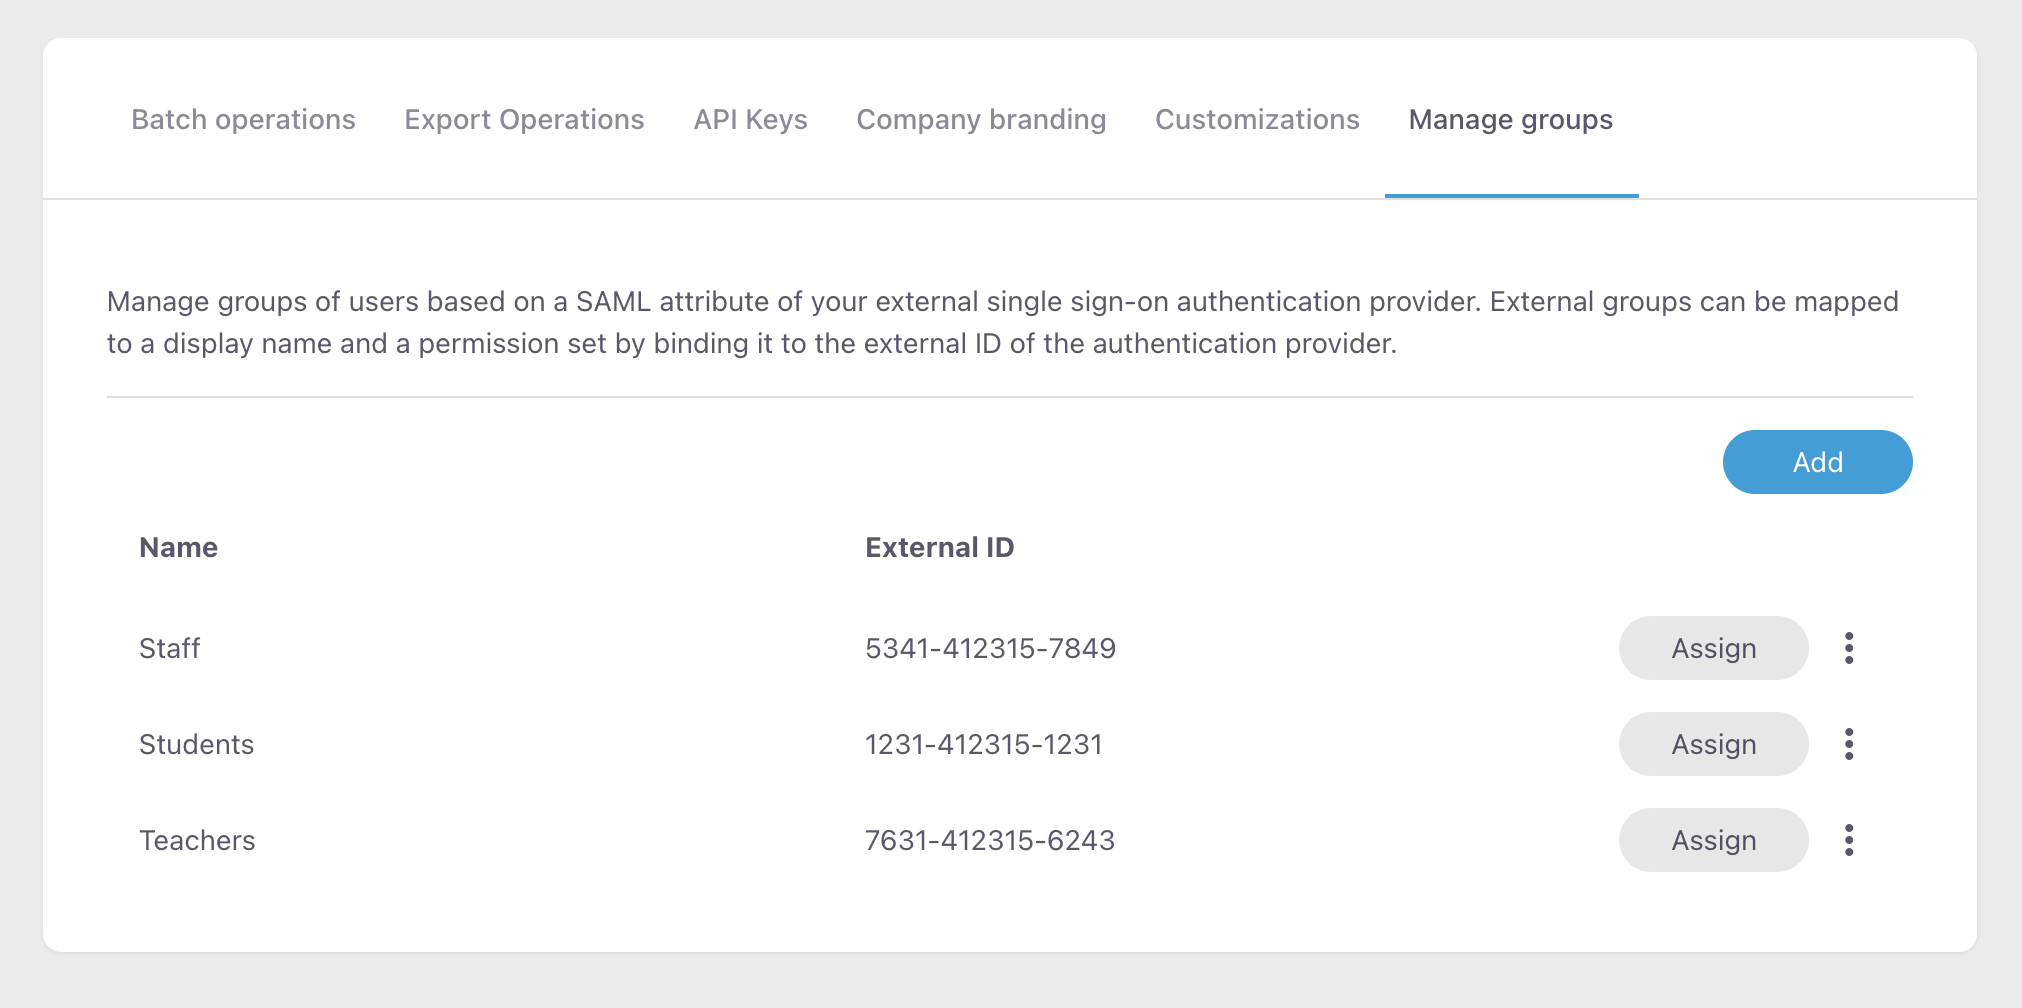
Users that use single sign-on (SSO) to authenticate with alfaview can be assigned to groups in the external Identity provider (IdP). These groups can be mapped to groups with specific permissions in alfaview and can be assigned to alfaview rooms and departments. This helps in managing large numbers of users in alfaview.
To configure this setting, you will need the permission to manage company settings. Additionally, the company needs to have its own custom subdomain to access this feature.
Creating groups
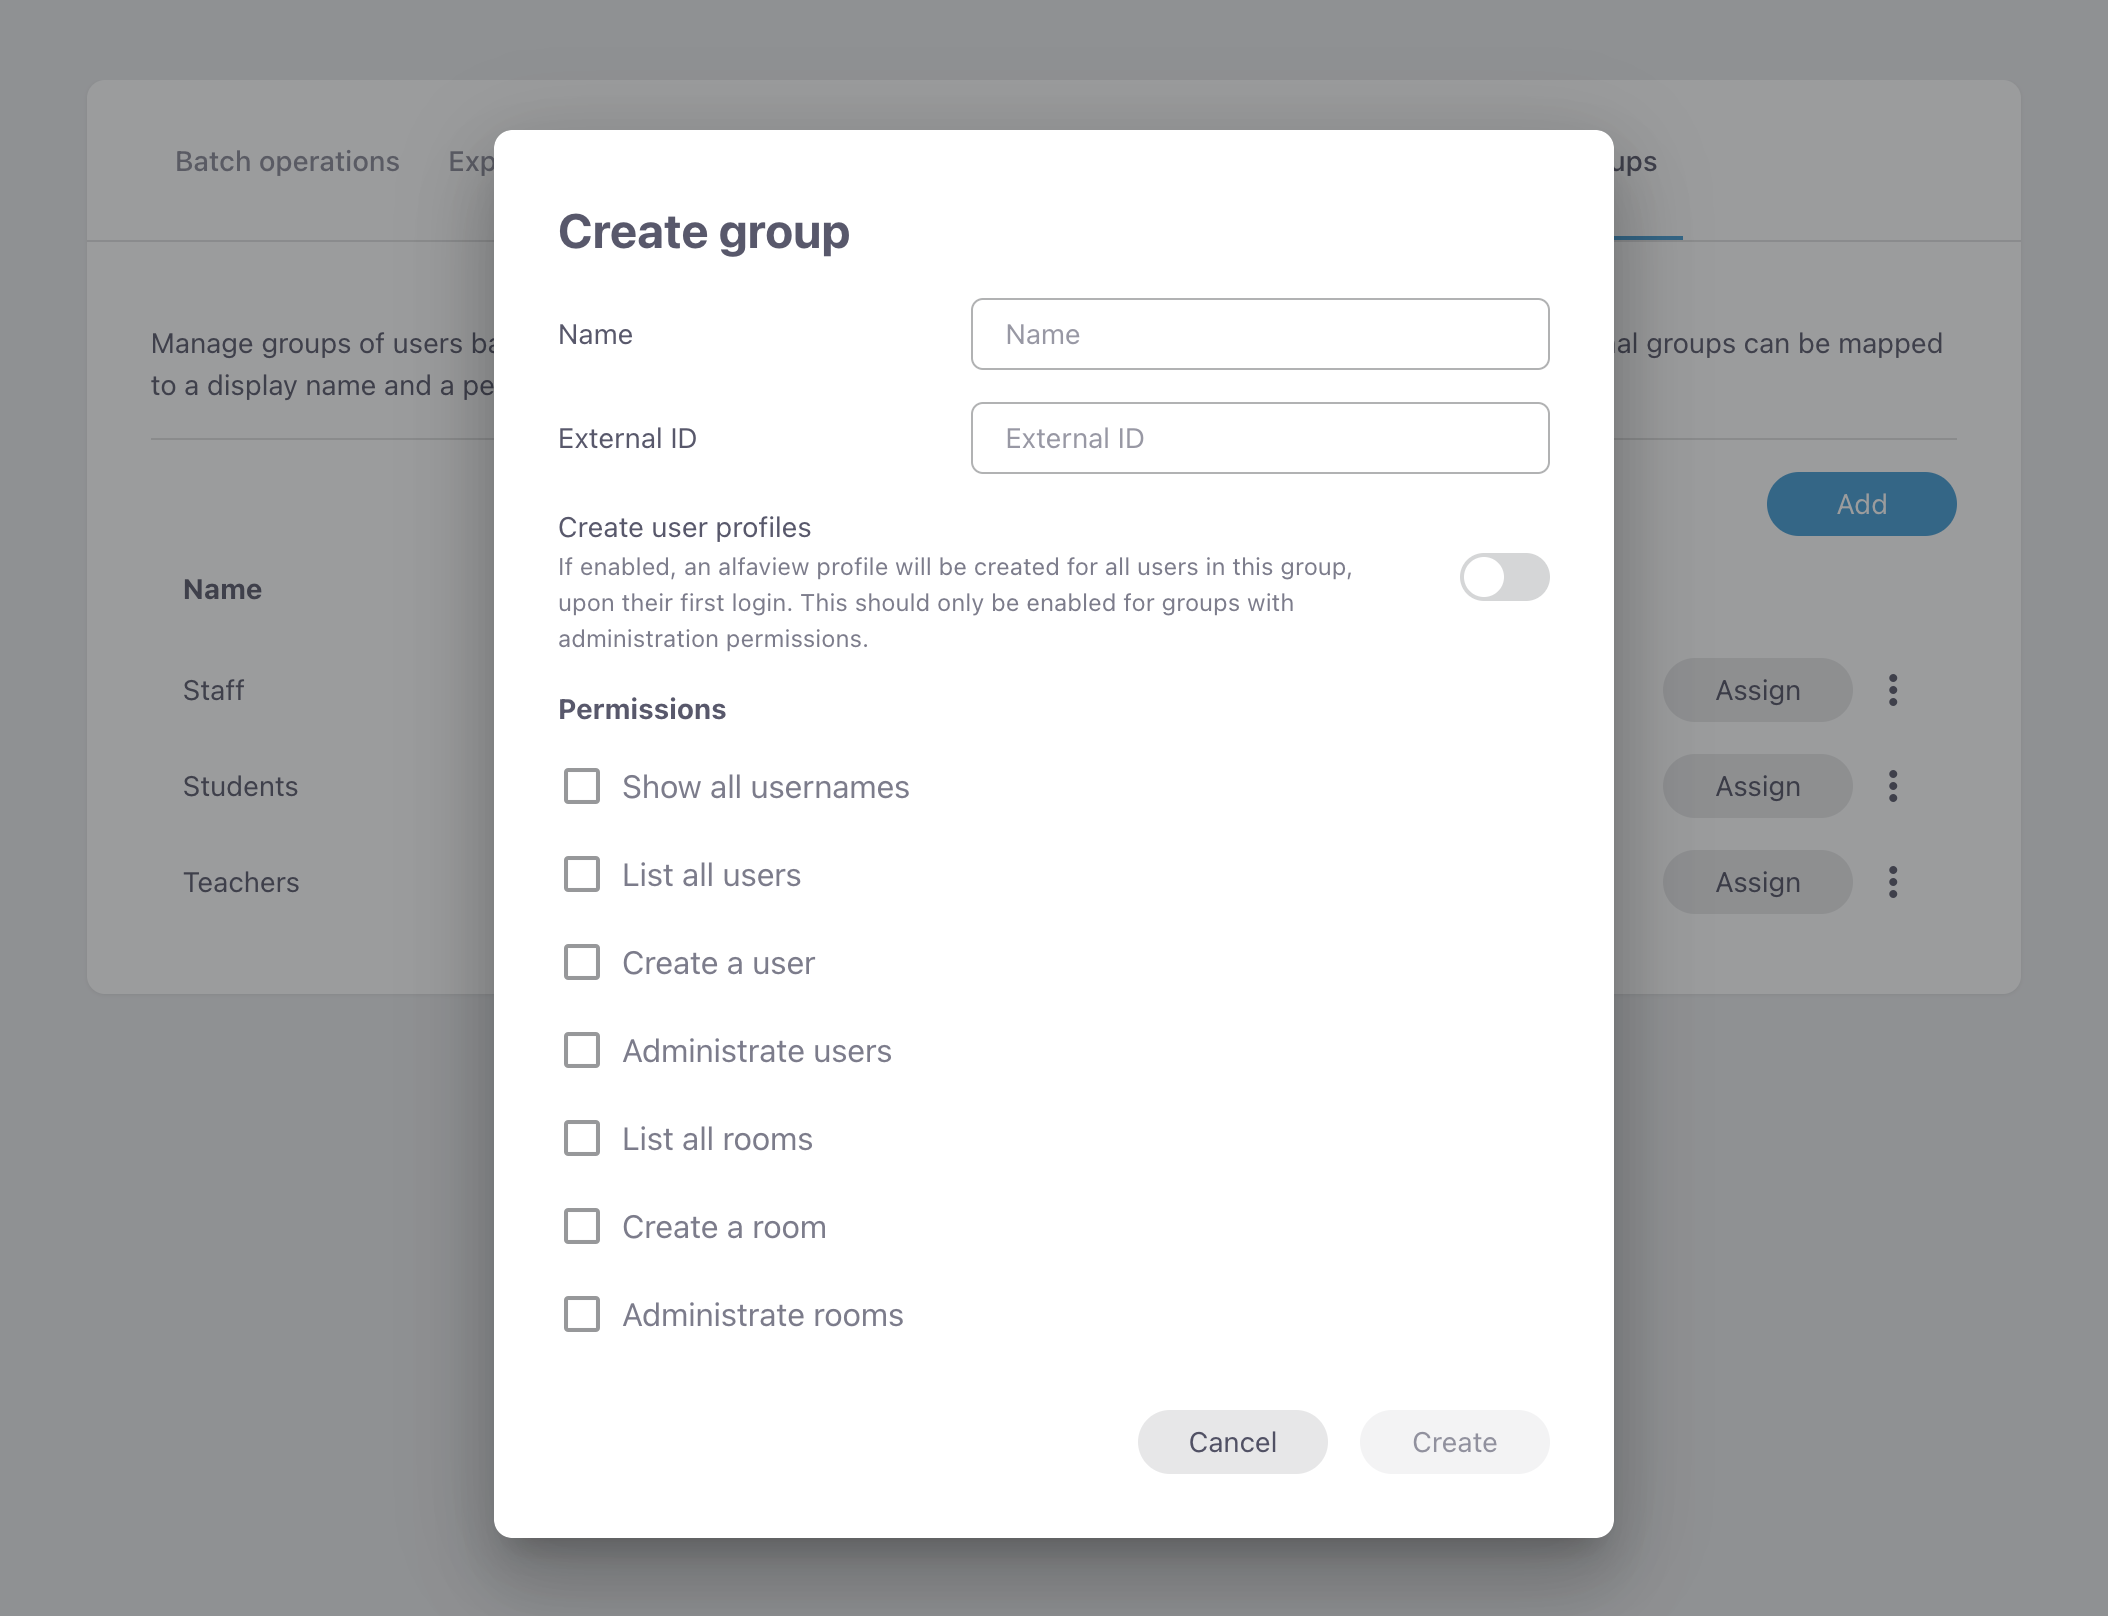
In the administration interface, navigate to account management > Manage groups. Click and fill in the required fields.
- Name: A name that will only be visible in this interface, an easy way to assign meaning to a group. (Example: Students, Teachers, etc)
- External ID: A unique ID that is managed by the IdP and will be sent on each login. It must exactly match the group from the IdP response and cannot be empty. Also this value is unique: no two alfaview groups can have the same external ID.
- Create user profile: If enabled, for all users that belong to this group, the system will generate an alfaview profile when they authenticate for the first time. This is required in order to give those users elevated administration permissions on the admin web interface. The profile data will be retained in alfaview.
- Permissions: The selected permissions will be granted to all users belonging to this group.
These permissions are always granted globally and cannot be restricted to a room or a department.
Editing groups
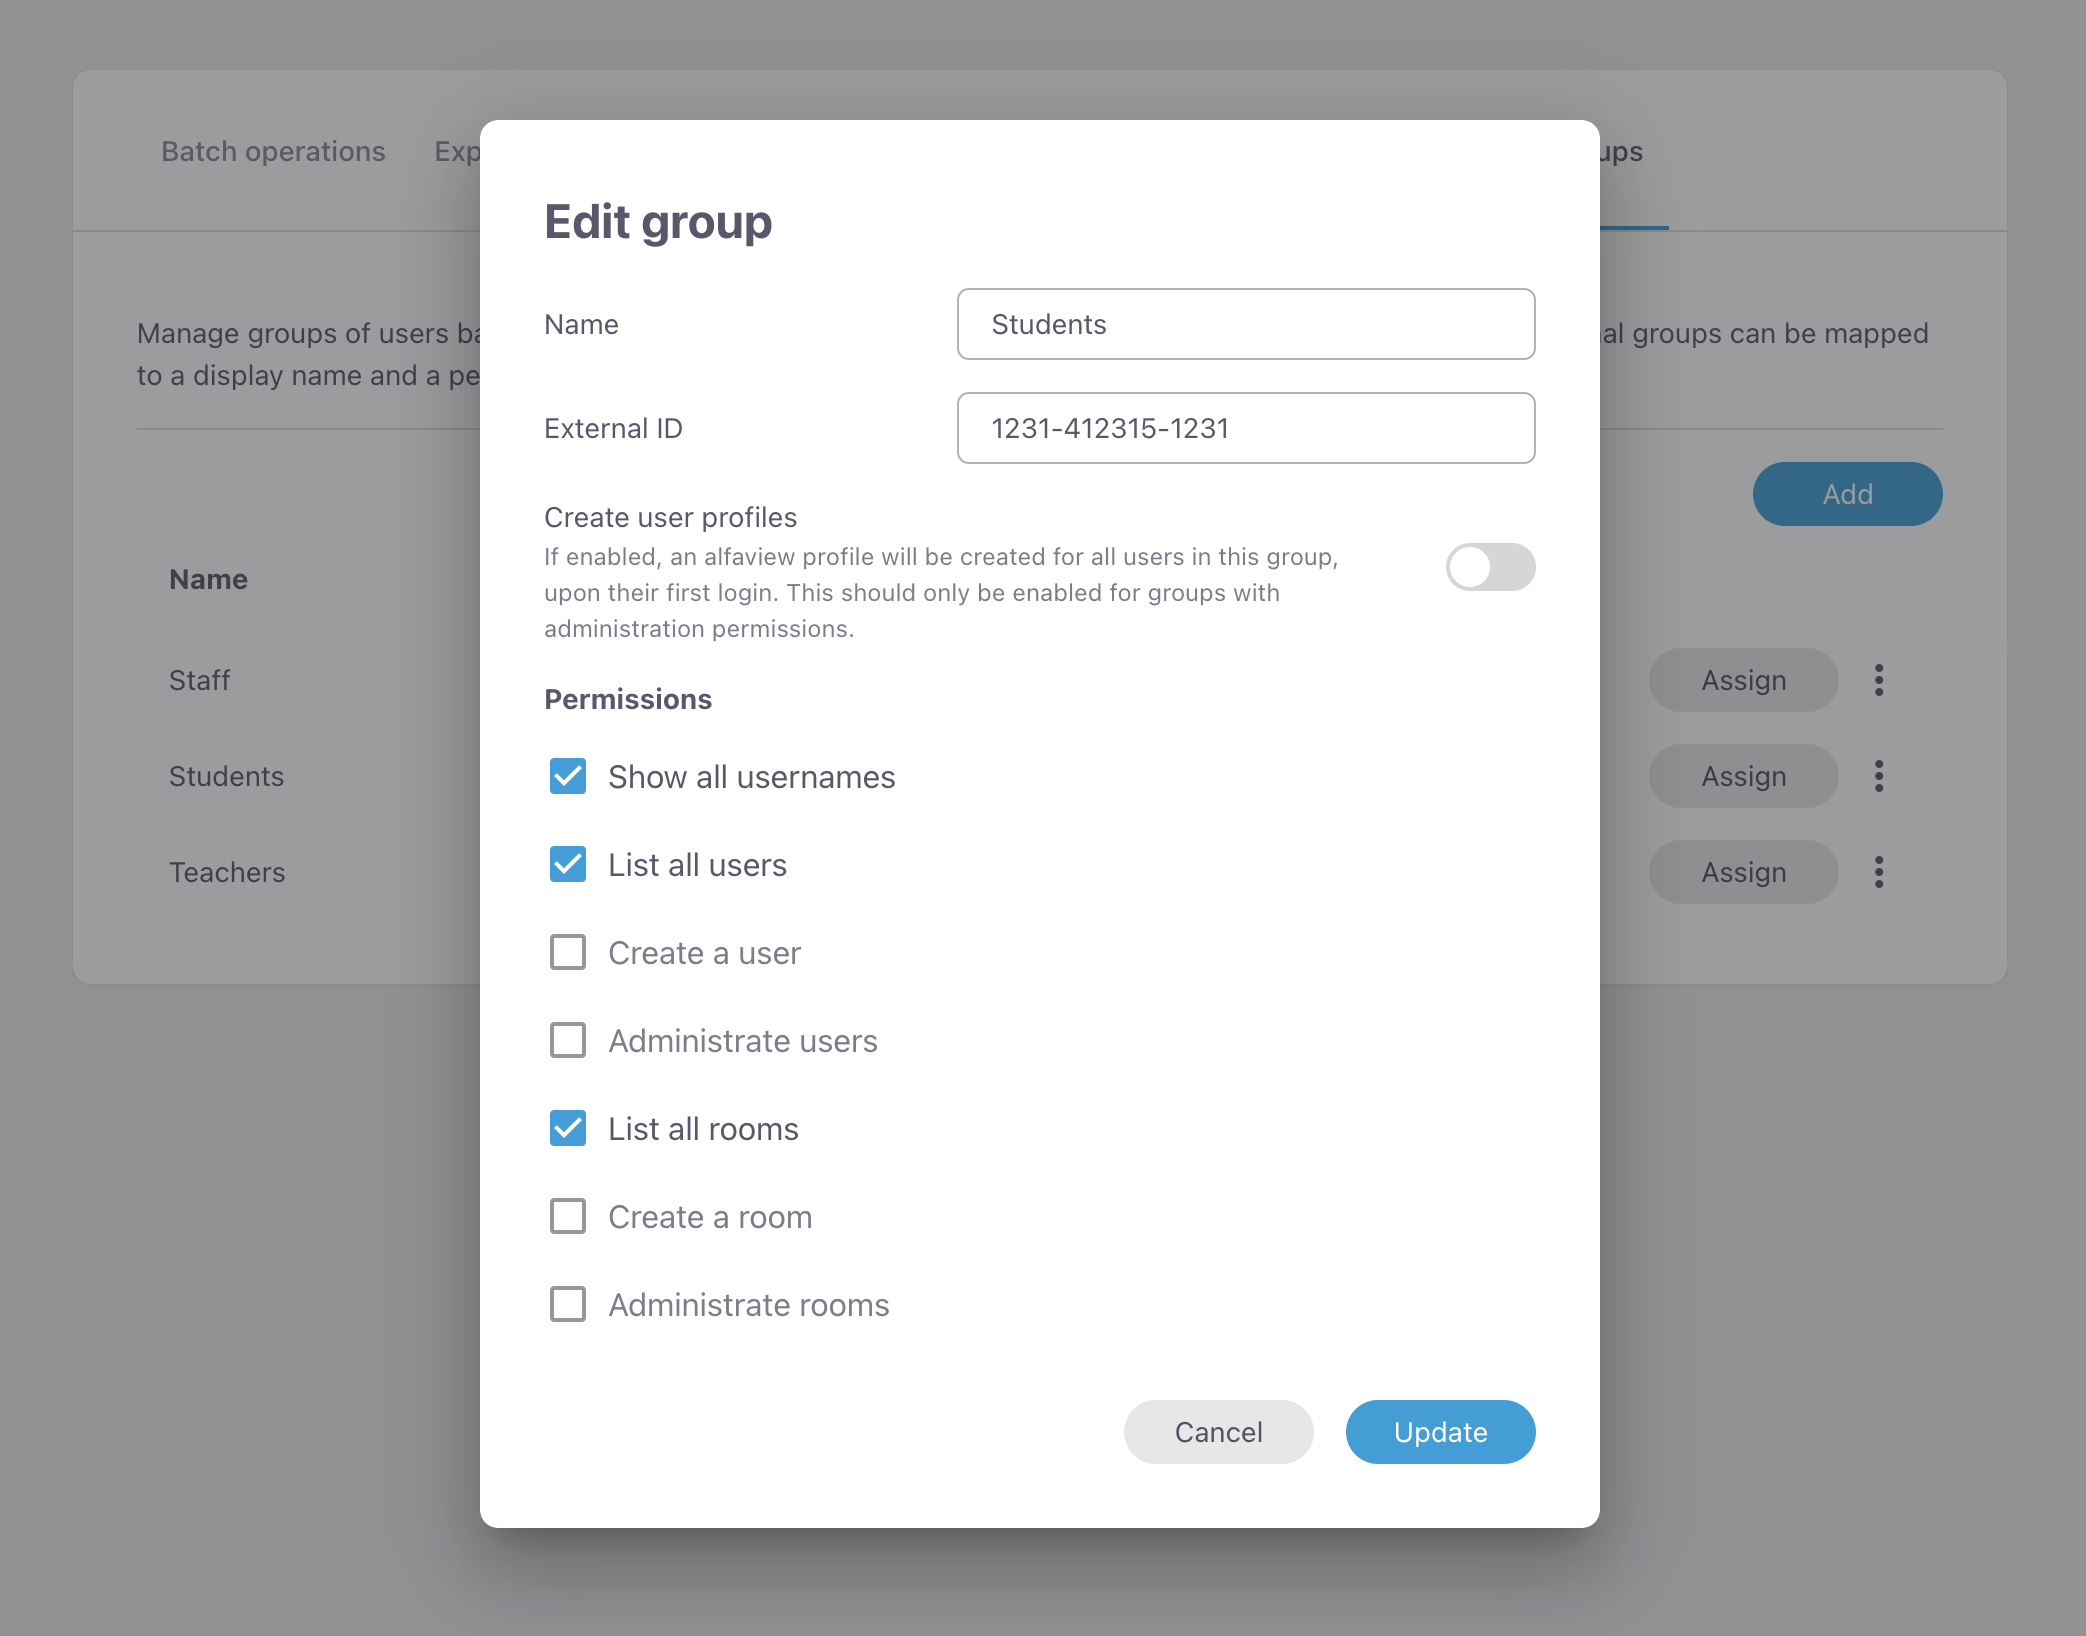
Existing groups can be edited via the group list on the main page. Click the triple dot menu for the related group, and select Edit. All options that are available in the Add dialog are also available in this dialog.
Deleting groups
Existing groups can be deleted via the group list in the main page. Click the triple dot menu of the related group, and select Delete. A confirmation dialog will be shown. The delete action cannot be reverted, and the group must be recreated from start if needed.
Assigning groups to departments
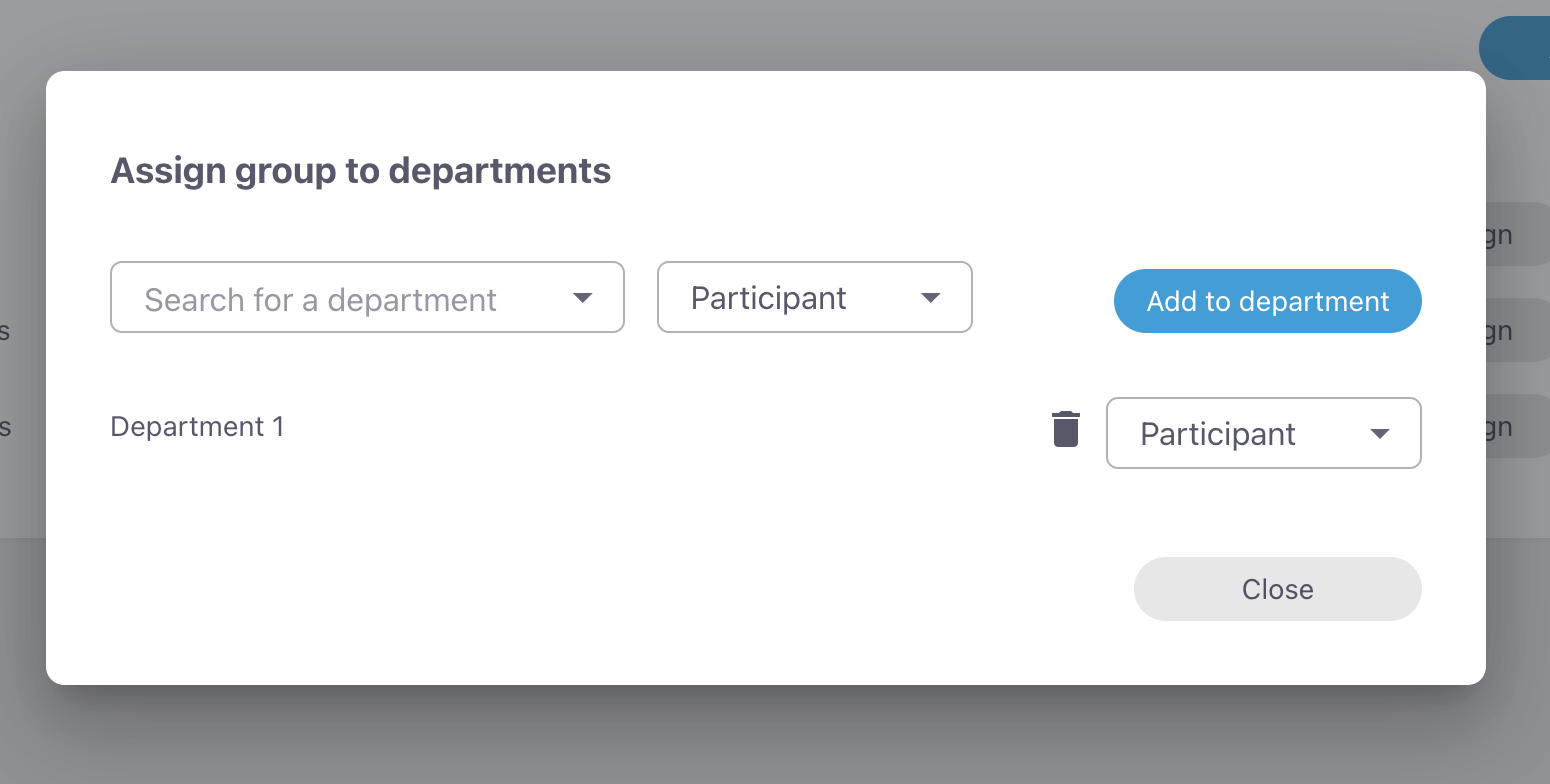
Existing groups can be assigned to departments via the group list on the main page.
Click the button of the related group. The assign dialog will be displayed.
All existing assignments can be edited or deleted on this page.
- To assign: Select a department from the dropdown list, select the permission level for this department and click .
- To unassign: Click the trashcan icon for the related department.
- To edit permission level: Click the dropdown for the related department and select a new permission.
Last updated on April 16th, 2025, 08:47 am