
Create meeting
Meetings are personal and time-limited rooms that all registered users can use to start a personal video conference. No special permissions are required to create a meeting. Each temporary meeting has its own title and agenda. Meetings are automatically deleted after they have been held and are no longer accessible.
When you create a new meeting, the role of the moderator will automatically be assigned to you.
Creating a meeting
- Log in to the administration interface.
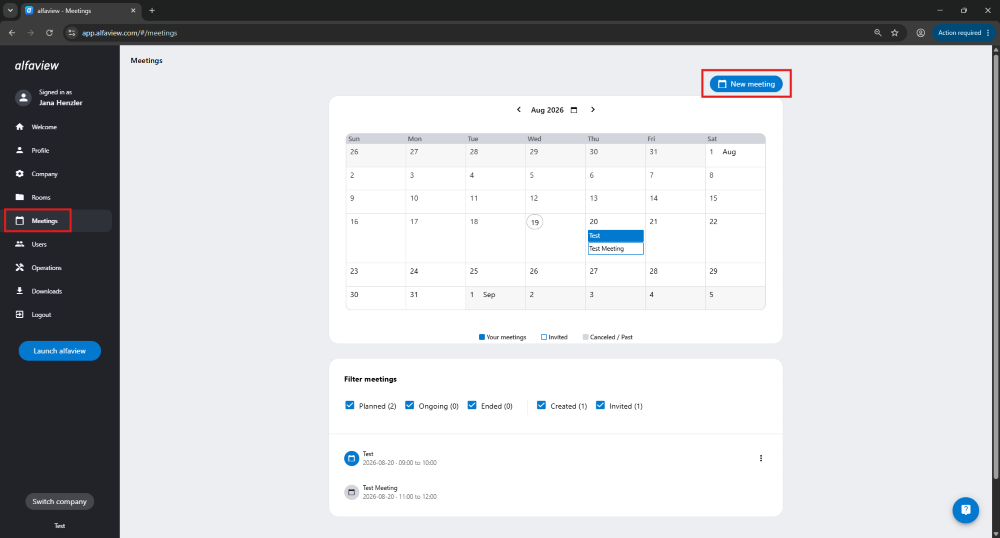
- Click on Meetings in the menu on the left of the administration management interface.
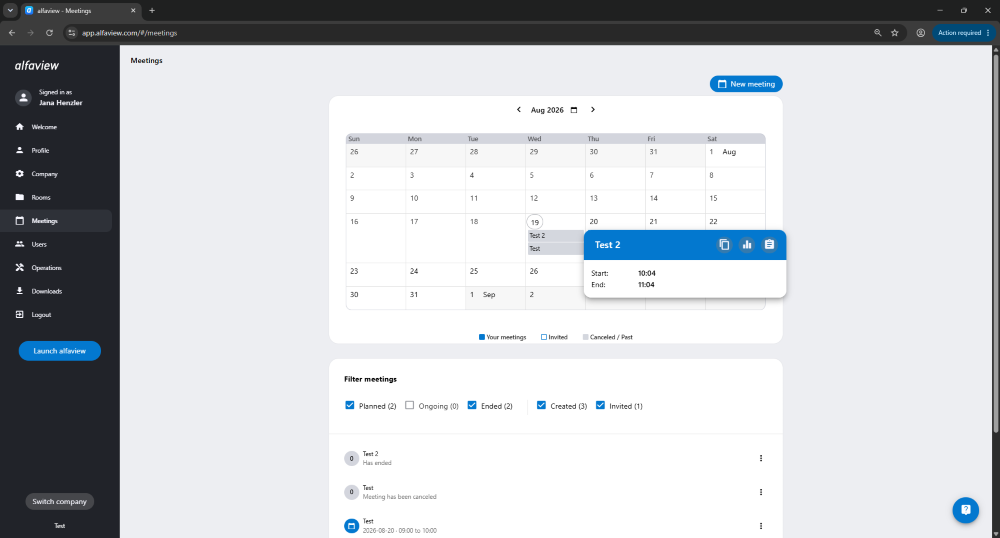
- You can see meetings that have already been created in the calendar and in the list below.
- Click on the button above the calendar to create a new meeting.
Specify your meeting
- Enter the title and agenda of your meeting in the input fields.
- You can adjust the following settings in the General tab:
- Starts: Click on the button to set the date and time of the meeting. If you do not change the default settings, the meeting will start immediately after being created.
- Time zone: Select the time zone in which the meeting will take place.
- Duration: Determine how long the meeting will last.
- Groups: The number of the groups indicates how many subgroups are within your meeting. Click on the drop-down menu to select one or more subgroups.
- Early access: You can allow participants to enter your room before the meeting starts.
- Waiting room: You can activate or deactivate the meeting’s waiting room. If you activate the waiting room, participants won’t be able to enter your meeting until you or other the moderators give them permission.
- Passcode protection: You can enable or disable passcode protection for your meeting. If passcode protection is enabled, a passcode will be automatically generated and must be entered before joining the meeting.
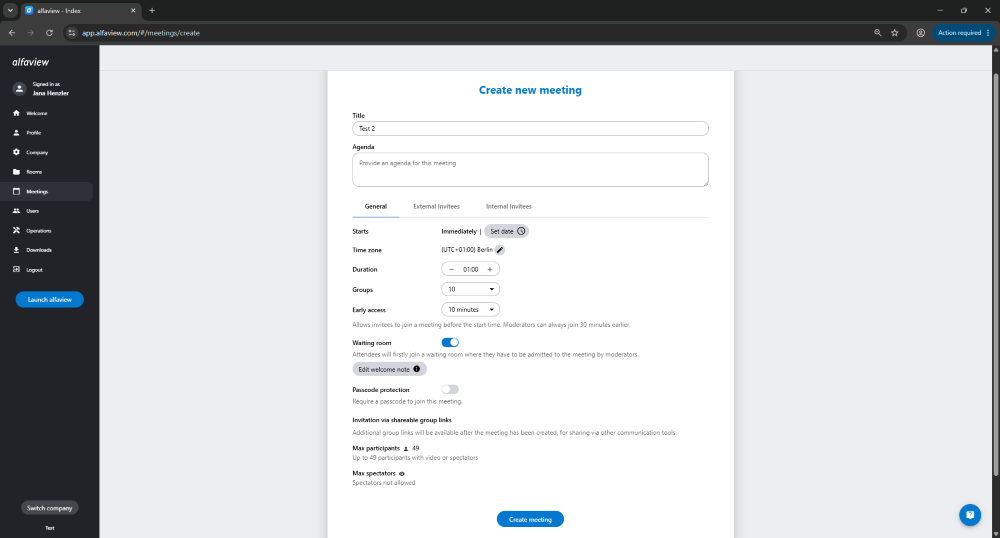
In the General tab, you’ll also find useful information such as the maximum number of participants and viewers, as well as information on automatically generating group links that you can share with your participants via other communication channels.
If you do not change the starting time and date, the meeting will start immediately after being created. This also means that you won’t be able to make any changes after creating the meeting.
Invite people to your meeting
External Invitees – Guest links
You can invite people to your meeting from the External Invitees tab. These people will receive a personalized invitation email.
You can either invite them manually by entering the email address, name and role or you upload a CSV file. A CSV file is more convenient if you invite a lot of participants.
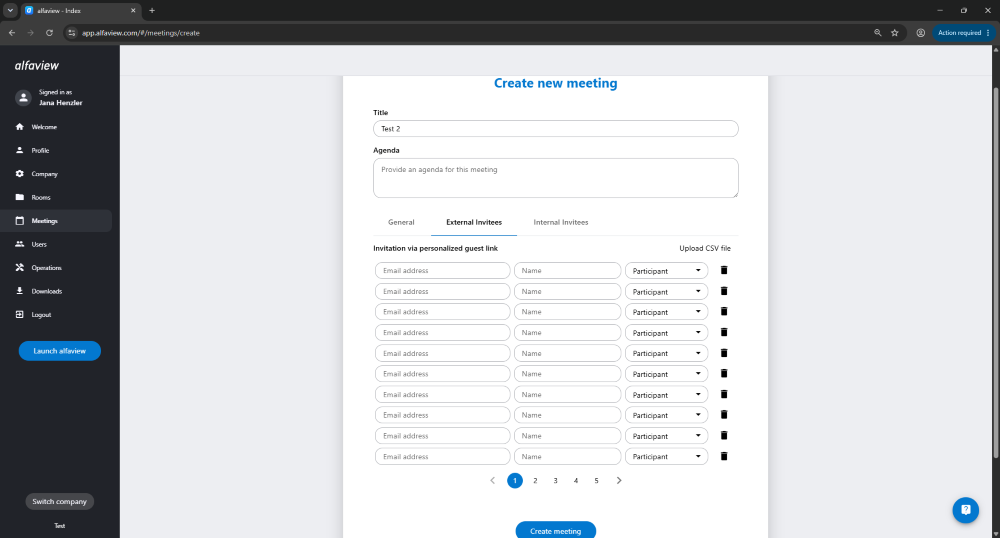
The CSV file should be in UTF-8 format. Separate the email address, the name and the role (not mandatory) using a comma or semicolon. In each line, there should only be the information of one participant. This will help transfer the information correctly into the invitation mask.
Internal Invitees
In the Internal invitees tab, you can invite people to your meeting who are already users in your company. These people will receive a personalized invitation email. The meeting will also appear in their meeting calendar and in the meeting and room lists within the app.
You can also specify the role in which these users will participate and the permissions they will have in the meeting as a result.
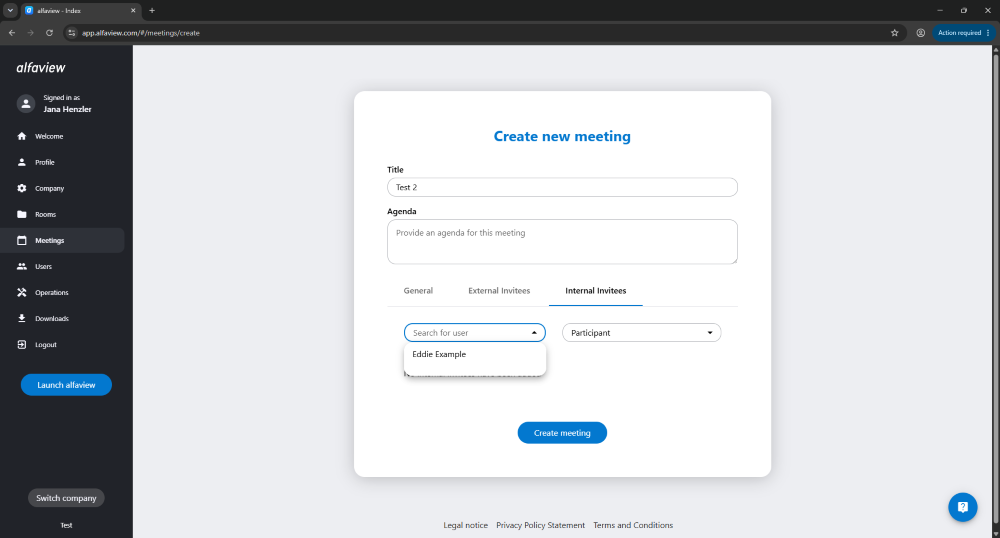
In order to invite users you need the user permission “List all users”.
Group links
Group links are generated after you create the meeting. These links allow you to invite multiple people with the same role at the same time.
- Click on the button.
- After creating the meeting, you can copy group links with the different roles as well as the passcode and send them to the participants via your preferred communication medium.
You can also access the group links at a later point of time by using the Edit meeting feature.
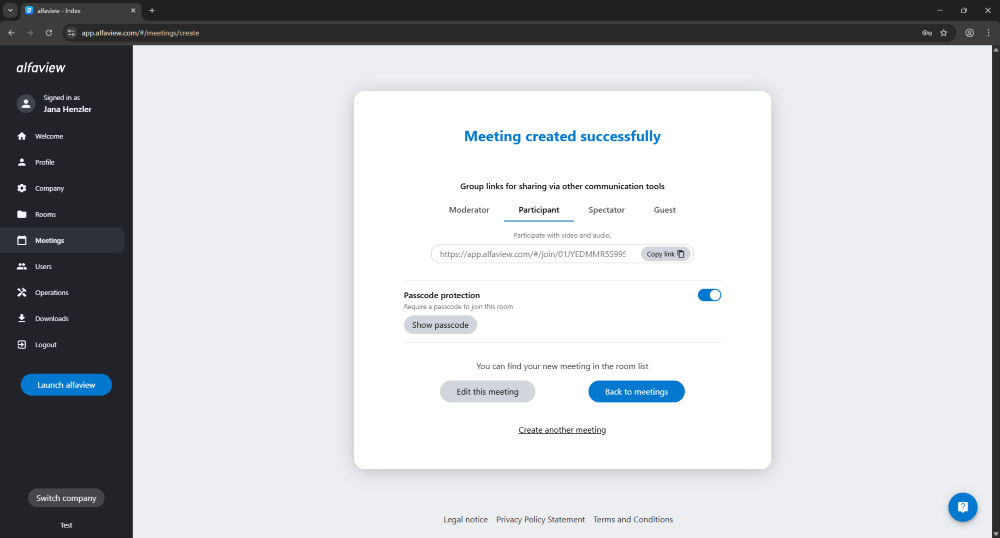
The participants aren’t visible to other registered users and also can’t be found using the search option.
Reuse Meeting Configurations
Existing meeting configurations can be reused to create new meetings. This means the participant list, date, time, and welcome message will be carried over to the new meeting.
Please note that the meeting features are not copied and must be reactivated.
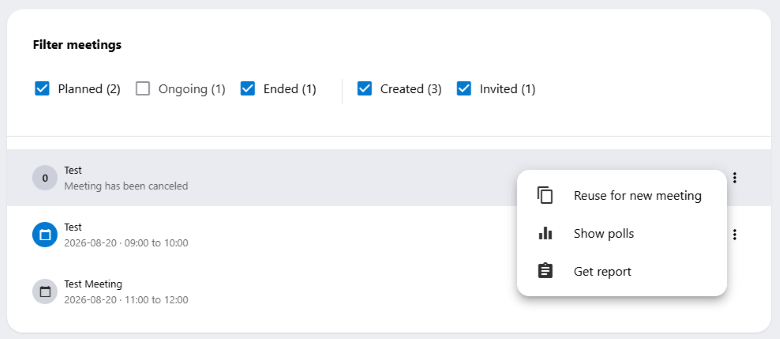
To reuse the meeting configuration, click the three-dot menu next to the meeting you want to copy in the “Filter Meetings” section below the calendar. A dialog box will open. Click . This will take you to the settings for the copied meeting.
Alternatively, you can click on the meeting directly in the calendar. A dialog box will open; please click the copy icon here. This will take you to the settings for the copied meeting.
Last updated on August 20th, 2026, 07:50 am