Edit room
Depending on the permissions, you can edit a room.
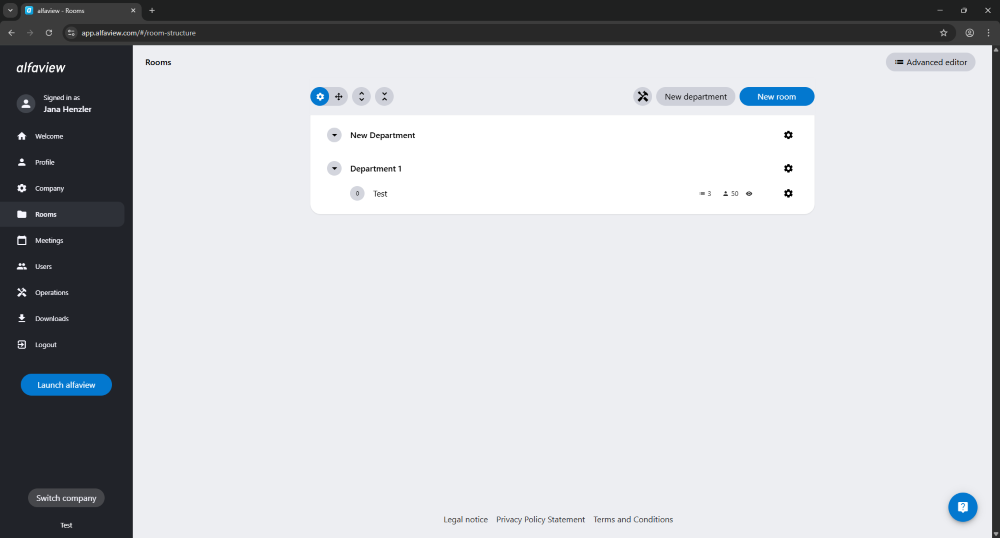
- In the menu of the administration interface, click Rooms.
- Select the room you want to edit.
- Click on the
 Settings icon of a room to edit it.
The feature is divided into the following sections (tabs):
As a room administrator, you can switch directly to the administration interface if you are currently in an alfaview room.
- Open the Room list by clicking on the
 Room list icon in the secondary menu.
 - Click on the
 context menu icon next to the name of the room you want to edit.
 - Click on the Manage room button, which will redirect you to the room management page.
Room
Here you can change the room name and the amount of breakout groups. Additionally you can delete the room.

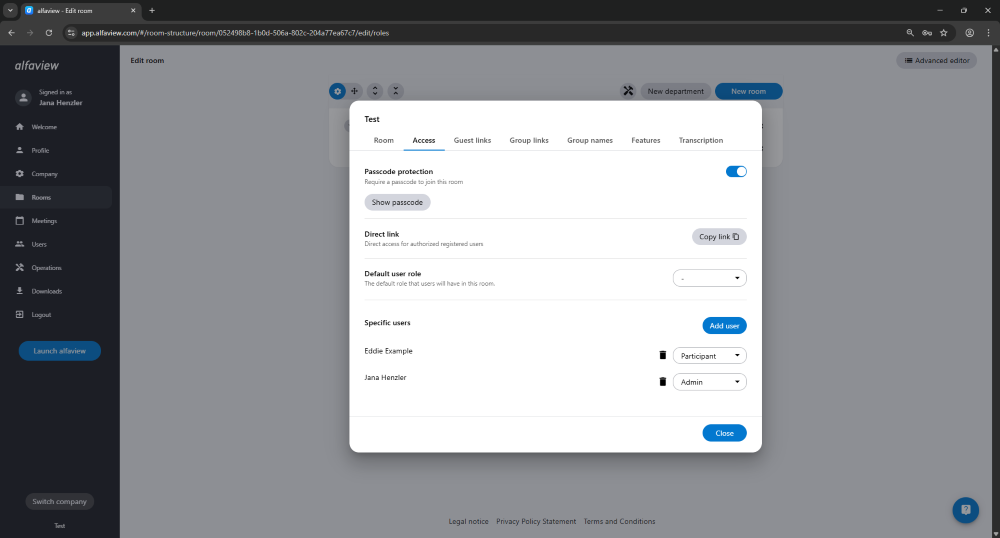
Access
The Access tab allows you to access the direct link, modify the default user role and add users from your company to the room.
Direct link
All users who have access to the selected room and who are members of your company can enter the room via the direct link. The user skips the start page and enters the room directly.
- Click on the button.
- Send the link to the members of your company who you would like to join the room, using a communication medium of your choice.
The direct links can only be used by users who are listed as active users in the user management. Users must log in with their account details to verify that they are authorised to access the room.
Passcode protection
For greater control over access, rooms can be protected with a passcode. Before joining, participants must enter the correct passcode, which can be activated, deactivated, or updated at any time in room management. Integrated protection limits repeated failed attempts.
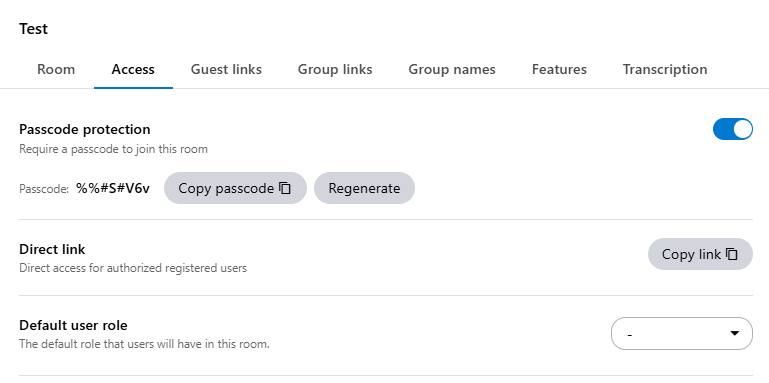
The room passcode must be re-entered after closing the alfaview app and is not saved. If you change rooms within a session and return without closing alfaview, you do not need to re-enter the code unless it has been changed in the meantime.
Default user role
If you grant users access to a room and do not select a specific role, they are automatically assigned the default user role.
- From the drop down menu, select Admin, Moderator, Participant, Spectator or Guest to specify which role should be used as the default user role.
Add users
You can add individual users from your Company to an alfaview room. You can either assign the default user role to the users or select a specific role. If no default user role is defined for the room, access or permissions must be defined individually for each user.
- Click on the button.
- Find and select a user from the search box.
- Choose the permission group.
- Click on the button.
The user is now listed under Specific users.
The user permissions override the default permissions. A typical application is to set the default permission Participant and define individual users as Moderator or Admin.
Guest and group links
You can use guest and group links to invite participants to your alfaview room. These participants do not need their own alfaview user account. You can find more information and instructions on how to create these links on the Guest and group links page.
Group names
In the Group Names tab, administrators can change the names of the subgroups as well as the order of the subgroups.
Rename Groups
- Click on the group whose name you want to change.
- Enter the desired name.
- Then click .
- For the changes to take effect, alfaview must be restarted.
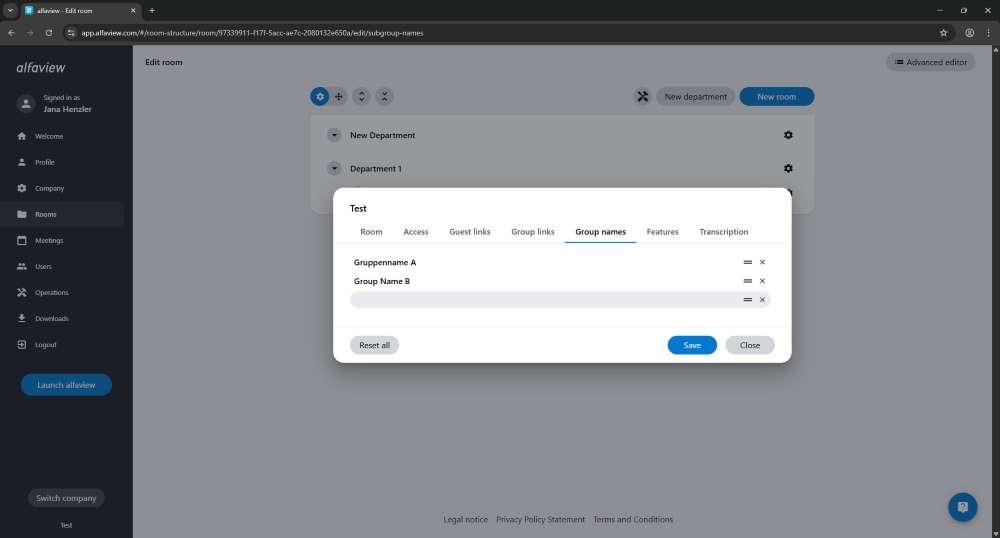
Organize groups
- Click on the icon with the two horizontal lines and hold down the mouse button.
- Drag the group to the location you want to move it to.
- Release the mouse button.
Room features
Customize your alfaview rooms with room features. You can set your room display preferences, such as alphabetical sorting of participants or displaying all videos in 16:9 aspect ratio. Help your moderators manage the room more easily by enabling the Raise Hand or Copy Attendance List features, or allow recording and live streaming in the room.
Visit the Room features page for an overview of all the features you can set for each alfaview room.
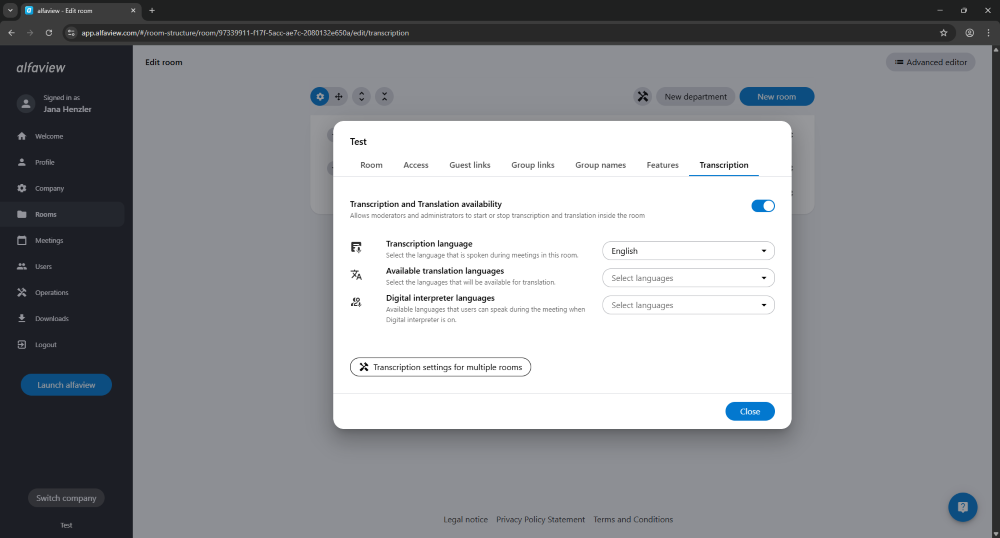
Transcription and Translation
alfaview helps you communicate more easily by offering two different transcription options:
- Live Transcription transcribes the participants’ spoken language into text. This feature is limited to one spoken language in the room.
- The Digital Interpreter helps participants who speak different languages to communicate with each other. The Digital Interpreter automatically translates what is said into the chosen language.
The translation feature helps you get more people involved and breaks down language barriers.
To change the transcription settings, you must have full room admin permission. This permission is granted via the User management.
The room language and translation languages can be selected by all room administrators who have room admin permissions for the specific alfaview room.
Enabling transcription
- From the room list, select the conference room you want to enable the transcription feature. Click the Settings icon.
- In the new window, go to the Transcription tab.
- Click the switch next to Transcription and Translation availability.
Settings
For an easier access, you can also adjust all settings in the alfaview app. For more information, see the articles Live Transcription and Translation and Digital Interpreter and Translation.
Transcription language
You can select the language for the Live Transcription feature. The room admin must change the language each time a meeting is held in a different language. For a complete transcription, all participants in the room must speak in the selected language.
- Click on the drop-down menu next to Transcription language.
- Select the language that will be spoken during meetings in this room. You can choose from Chinese (simplified), English, French, German, Italian, Portuguese, Russian and Spanish.
Available translation languages
You can select up to three translation languages at the same time. These translation languages can be used to translate both the live transcription and the Digital Interpreter.
- Click on the drop-down menu next to Available translation language.
- Tick the boxes infront of the languages you want to enable.
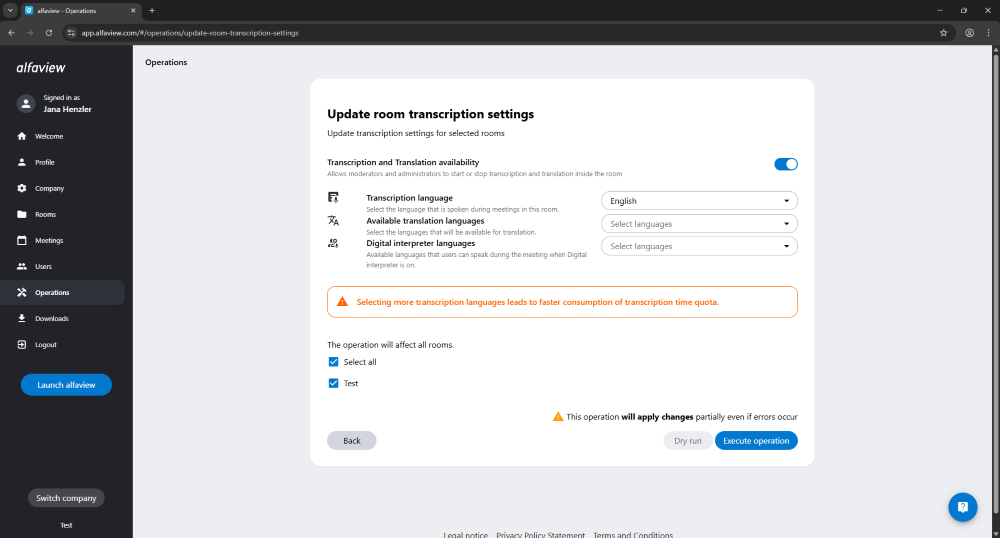
Selecting more than one language means that the transcription quota is used up more quickly.
Digital Interpreter languages
With the Digital Interpreter, you can select multiple languages for the participants to choose from.
- Click on the drop-down menu next to Digital interpreter language.
- Tick the boxes for the languages you want to enable. The languages currently available are Chinese (simplified), English, French, German, Italian, Portuguese, Russian and Spanish.
The changes will be saved automatically.
In addition to the selected transcription language, you can choose up to three translation languages at the same time. Selecting multiple languages will result in faster consumption of your transcription quota.
Batch operations
You can also change the settings for multiple rooms at the same time.
- Click the button.
- Click the switch next to Transcription and Translation availability to enable the feature.
- Select the Transcription language, available translation languages and the Digital interpreter languages.
- Tick the box for all rooms where you want the selected transcription settings to be enabled. If you want the transcription feature to be available in all rooms, tick the Select all box.
- Click the to save your changes.
If you want to activate the live transcription feature in your alfaview room, follow the instructions on the Live Transcription and Translation page.
Last updated on March 9th, 2026, 02:02 pm