Set up Camera and Microphone
Before entering a meeting or alfaview room
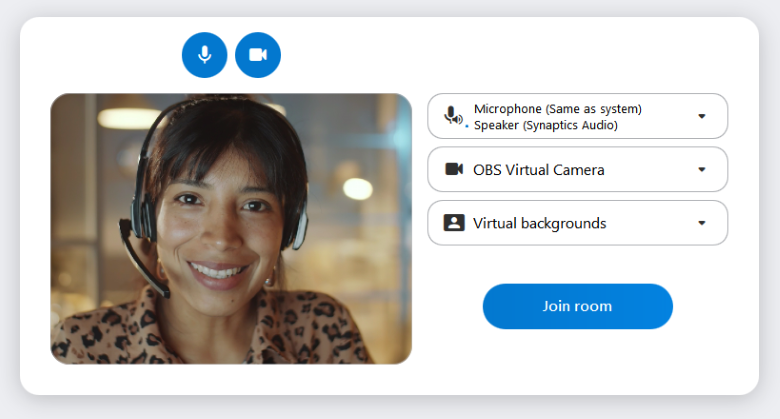
Before you enter an alfaview room, the Quick Setup menu is displayed. This allows you to adjust the settings for your audio equipment and camera.
Set up your camera
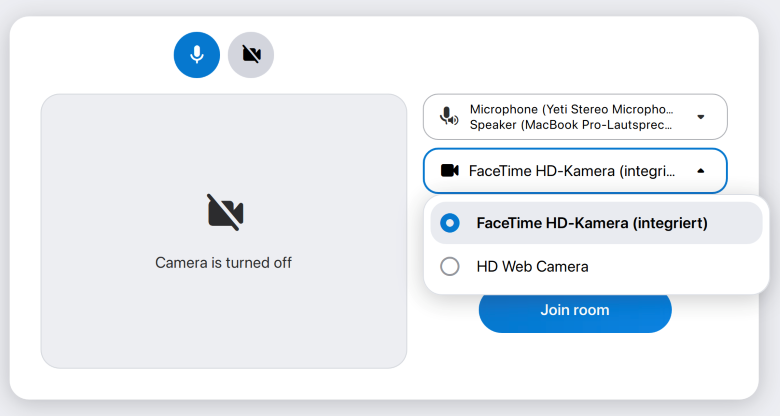
You can see a preview video of the camera your device selected by default in the Quick Setup window. If you want to select a different camera, you can do so in the menu on the right of the video.
If you see the message Camera is turned off instead of a video, please activate your camera.
- Click on the
 camera icon above the preview video.
 - Then, click on the camera on button.
Your camera is activated when the camera symbol is displayed in blue.
Select a camera
- Click on the drop-down menu with the camera icon and the name of the preselected camera.
- The drop-down menu will open. Select the camera you want to use.
- The preview video on the left will now show the video of your selected camera.
Virtual Backgrounds
The feature Virtual backgrounds allows you to hide your video background and protect your privacy.
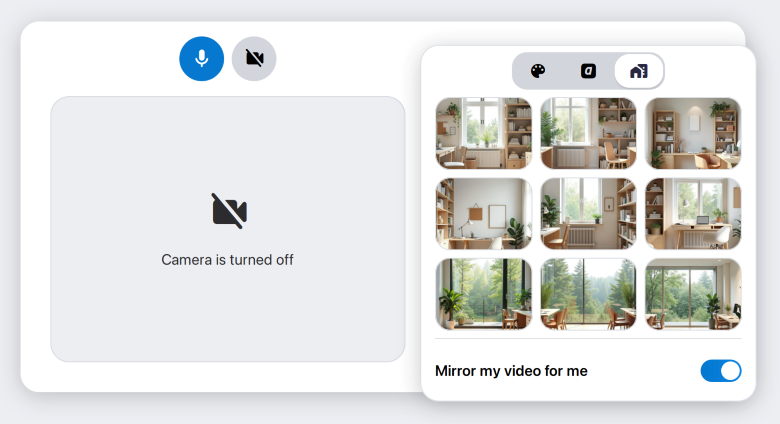
- Click on Virtual Backgrounds in the menu on the right.
- Select how you want to edit your surroundings. You can choose from colour backgrounds, standard backgrounds and study backgrounds.
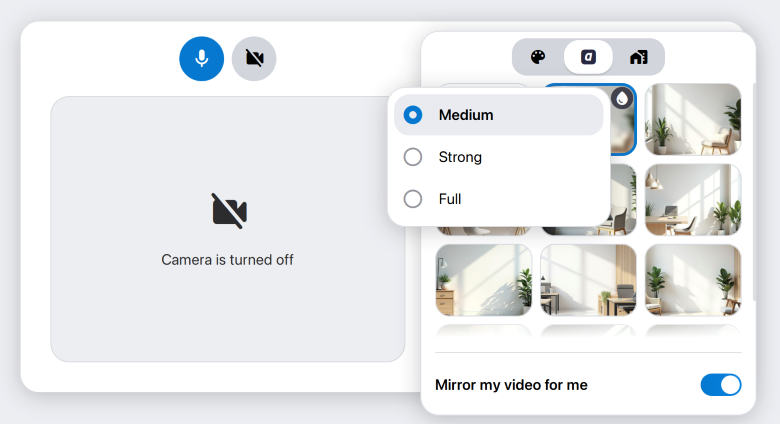
- Standard backgrounds also offer three levels of blurring. To select the blur intensity, click on the drop icon.
- You can also select the option to mirror your own video for yourself. The participants in the alfaview room will see your video unmirrored. Click on the slide control to activate or deactivate this feature.
Your settings will be saved and applied the next time you start alfaview.
Further settings can be found under General settings.
You can decide who is allowed to see your video before you join an alfaview room. Click on the camera icon above the preview video and select one option.
Camera on
Everyone in the alfaview room can see you, and you can see everyone.
Camera to VIP only
Only VIPs in the room can see your video, and you can only see the videos of VIPs.
Camera off
No one can see your video. You are also not able to see other participants’ videos.
alfaview follows the principle I see you, you see me. In practice, this means that you can only see the videos of the other participants if your own camera is running.
Set up your audio device
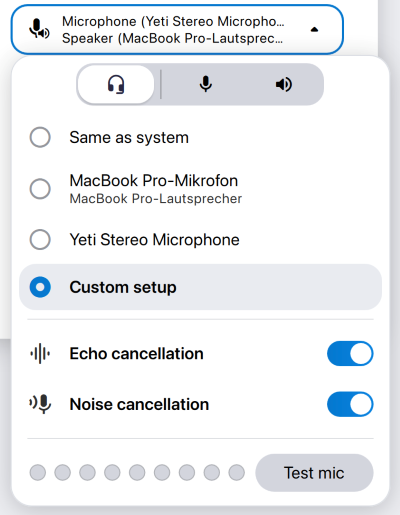
You can select your audio device from the menu to the right of the preview video. Click the microphone icon to open the drop-down list.
The drop-down list is divided into the tabs Headset, Microphone and Speaker. Here you can select your preferred devices.
If you connect a new audio device to your computer after starting alfaview, a message window will appear. In this window you can select the new device as the audio device.
Headset
- In this tab, you can select the headset to be used in the alfaview room.
- You can also activate the Echo cancellation and Noise cancellation. To do so, click on the switch next to the feature you want to activate.
The Headset tab is only displayed when a headset is connected to the PC. If no headset is detected, there will be only the Microphone and Speaker tabs.
Microphone and Speaker
If you want to use a separate microphone and speaker instead of a communication device, select the devices in the Microphone and Speaker tabs. To test the functionality of your speakers, click Test Speaker.
If you are using a separate microphone, we recommend that you enable Noise cancellation and Echo cancellation. This will minimize background noise.
Echo cancellation
If you are using a separate microphone and loudspeaker instead of a headset, we recommend that you enable Echo cancellation. This setting prevents audio being picked up from your speaker and retransmitted by your microphone.
If you are using a headset, Echo cancellation is automatically disabled.
Noise cancellation
Noise cancellation filters out unwanted background noise from microphone transmissions, improving your audio quality.
Activate microphone before entering an alfaview room
You can decide whether you want to enter the alfaview room with the microphone on or not.
- To do this, click the
 microphone icon above the preview video.
 - If the button is blue, your microphone is on. The icon will also pulsate when you speak.
Your settings will be saved and applied the next time you start alfaview.
Further settings can be found under General settings.
In a meeting or alfaview room
You can still change the camera and audio settings if you have already joined an alfaview room.
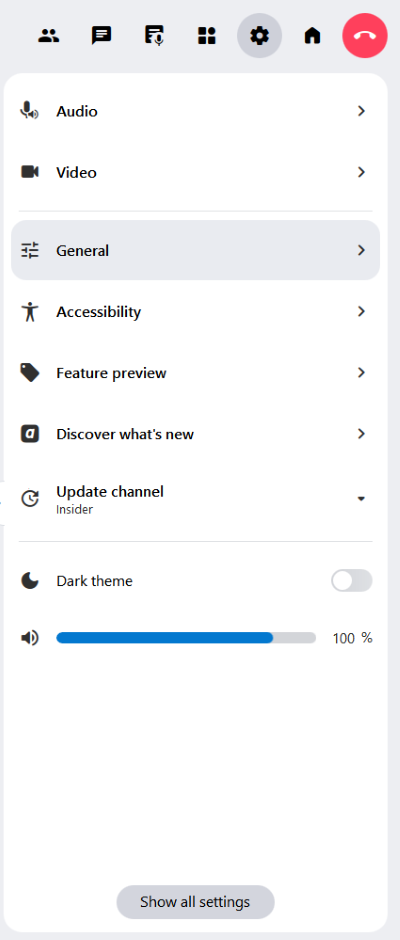
- Click on the
 Settings icon in the secondary menu.
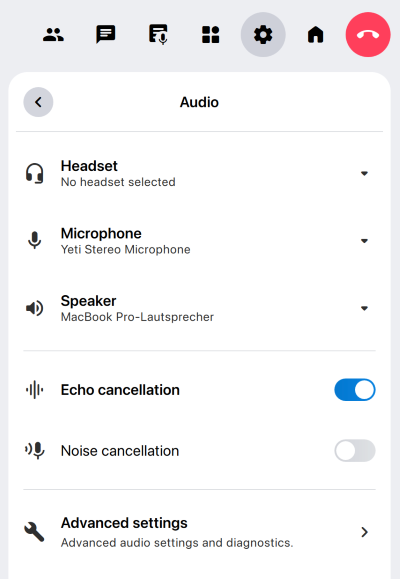
 - Audio settings:
- Click on Audio.
- Select your microphone, speaker and headset from the corresponding drop-down menus.
- Enable or disable Echo Cancellation and Noise Cancellation by clicking on the sliders.
- In the Advanced Settings, you can optimize your microphone and set the level of noise cancellation.
- Video settings:
- Click on Video.
- Select your camera from the corresponding drop-down menu.
- Protect your privacy by using virtual backgrounds.
We recommend the automatic Noise cancellation.
If you want to optimize your microphone yourself, you can use our Microphone optimization.
Microphone optimization
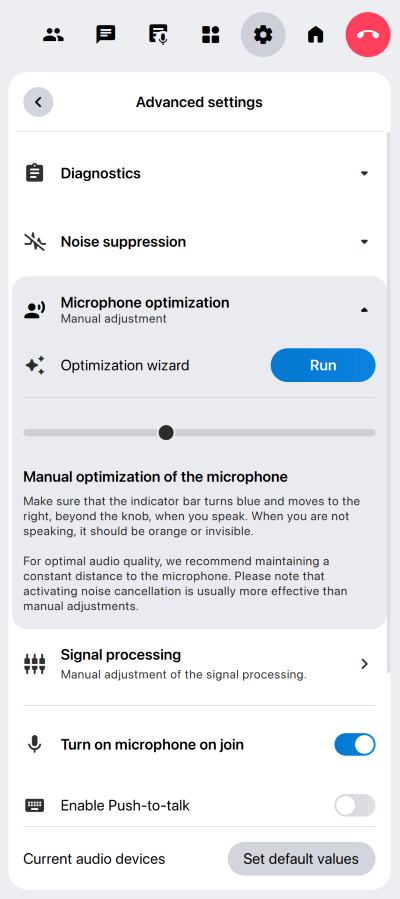
Microphone optimization allows you to manually adjust the noise reduction settings to suit your device.
- Disable Noise cancellation.
- Click on Advanced settings and select Microphone optimization, which allows you to manually adjust the noise cancellation for your microphone.
- We recommend that you use the Optimization wizard. To do this, click the button.
- Read the text at normal volume.
- Your microphone is now optimized.
Alternatively, you can optimize your microphone yourself.
- Speak into your microphone.
- Now move the slider to adjust the microphone sensitivity. Make sure the indicator bar turns blue and moves beyond the slider to the right.
- When you are not speaking, the indicator bar should be orange or invisible. This means that your voice is not being transmitted.
Last updated on November 18th, 2025, 10:16 am
